Prior to submitting any documentation to the Imaging and Documentation Services (IDS) team for processing into the IRS, your *DEFINE voucher cover sheet PDF and supporting documentation PDF must be combined into one PDF. If one of your PDFs has signature fields, please visit Preparing PDFs with Signature Fields for Upload to Box for instructions.
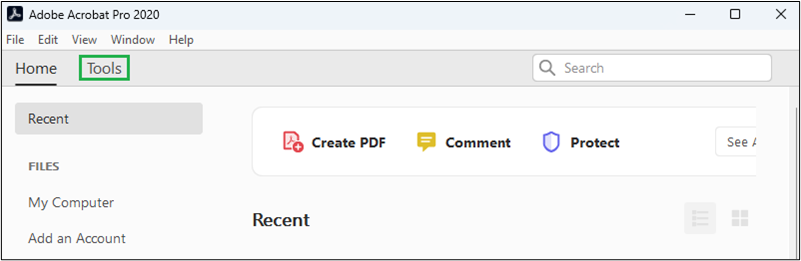
- Open Adobe and click “Tools” in the upper left-hand corner.
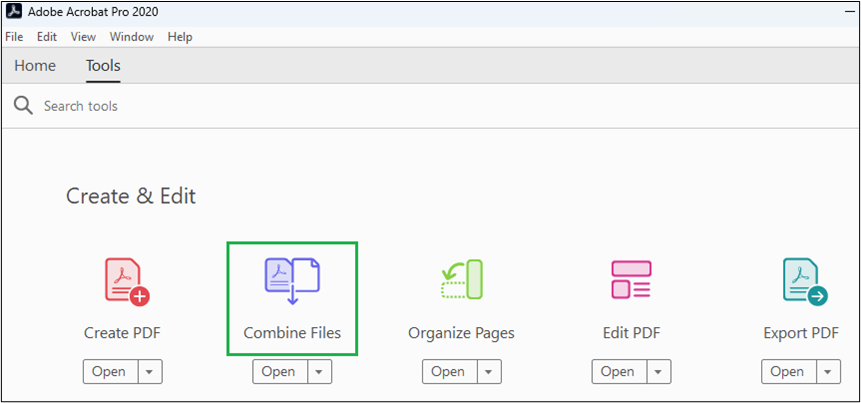
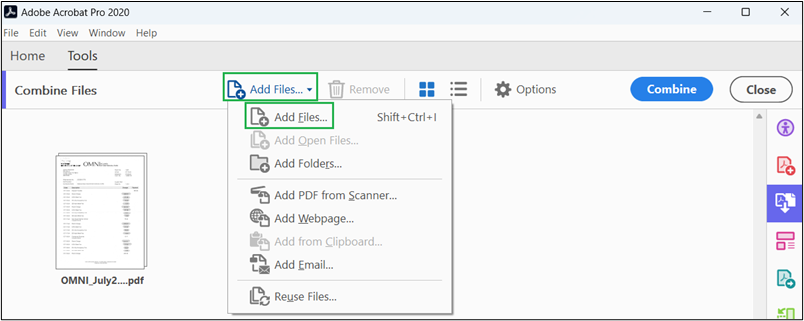
- Click the "Combine Files" button.
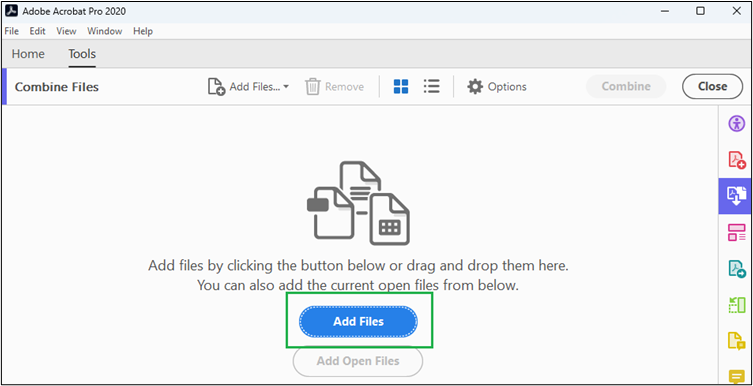
- Click the "Add Files" button.
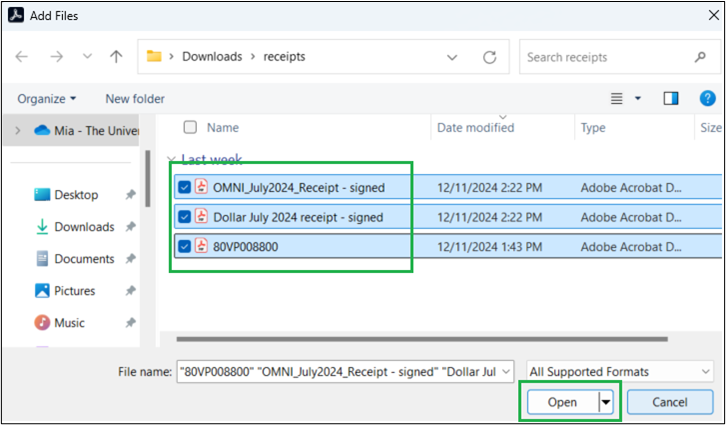
- Your File Explorer will open in a new window. Browse to the file location of your documents, then select your cover sheet and all supporting documentation PDFs. To select more than one file at once, select the first document and hold down the "ctrl" key on your keyboard while you select the other files.
- Click the "Open" button.
- To add additional files, click the "Add Files…" menu, and then select "Add Files…" Repeat Steps 4-6 as needed until all needed files have been selected.
- Confirm that the icon for your *DEFINE cover sheet is the first file on the far left of the screen. If it is not the first file, click and drag it to the left so that it will be the first page of your document.
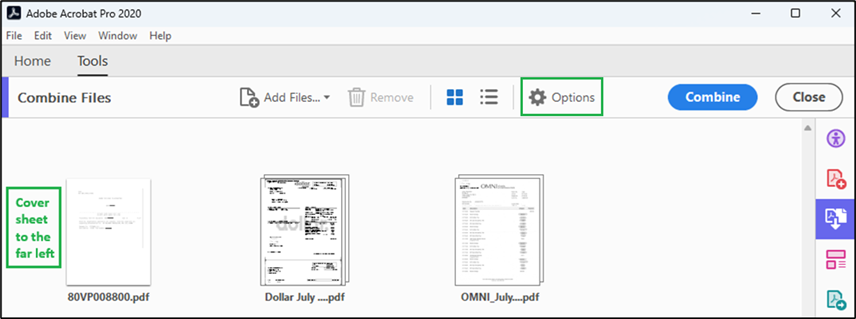
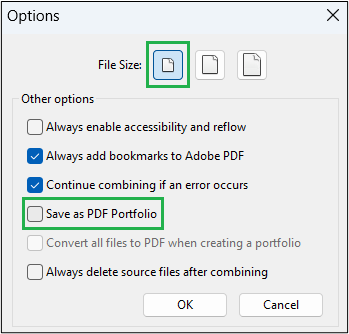
- Before combining the files, click the "Options" button, as seen in figure 6. The "Options" dialog box will open. The "Save as PDF Portfolio" option must be unchecked, and best practice is to select the smallest file size option, as indicated in figure 7. Click the "OK" button.
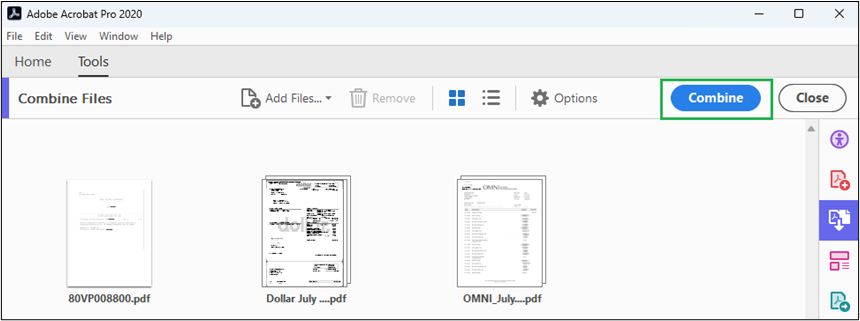
- Click the "Combine" button.
- You now have a PDF with the *DEFINE cover sheet as the first page followed by all supporting documentation. If your PDF has already been converted to grayscale or black and white, you may skip to step 15. If your PDF is not in grayscale or black and white, please continue to step 11.
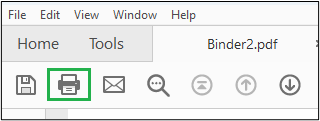
- With the combined PDF document open, click the printer icon.
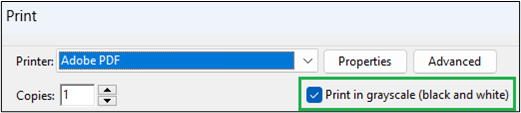
- Select Adobe PDF as the printer and confirm that the "Print in grayscale (black and white)" checkbox is checked.
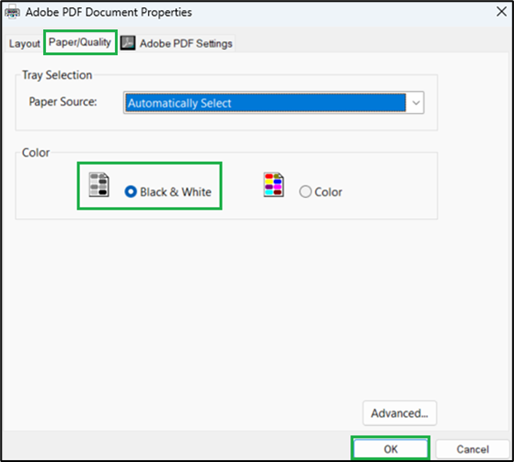
- Click the "Properties" button to open the Document Properties dialogue box.

- Click the Paper/Quality tab. Then, under the "Color" options, select the "Black & White" radio button, then click the “OK” button.
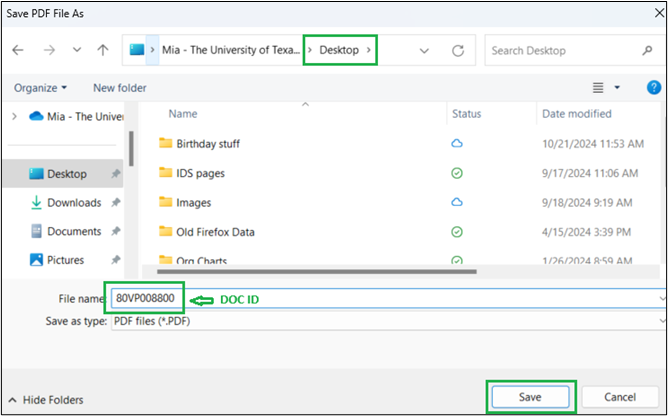
- Click the "Print" button on the print screen, which will open a separate window where you must rename your document with the Doc ID and select the location to save the new file. Click the "Save" button.
Contact IDS
- Address:
-
Imaging and Documentation Services
110 Inner Campus Drive
Campus Mail Code: K5400
Austin, Texas 78712
- Phone: