Vouchers and supporting documentation that need to be submitted to Imaging and Documentation Services (IDS) for processing into the IRS must be in PDF format. If supporting documentation, such as receipts, are in color, the documentation must be converted to grayscale or black and white by re-printing the documents using the Adobe Acrobat printer function. OS X users have access to different print-to-PDF options by using the Preview app.
Convert to Grayscale
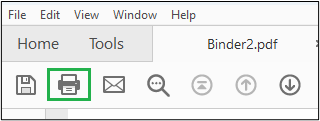
- With the PDF document open in Adobe Acrobat, click the printer icon.
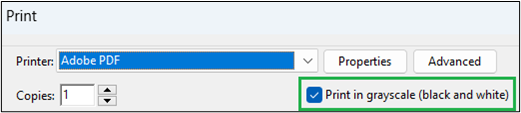
- Select Adobe PDF as the printer and confirm that the "Print in grayscale (black and white)" checkbox is checked.
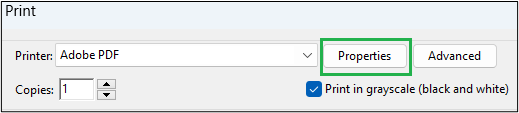
- Click the "Properties" button to open the Document Properties dialogue box.
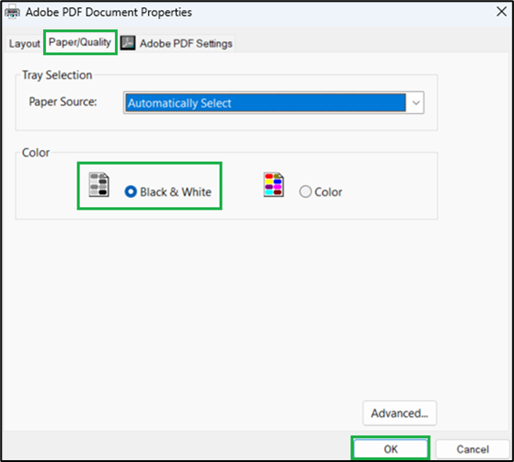
- Click the Paper/Quality tab. Then, under the "Color" options, select the "Black & White" radio button, then click the "OK" button.
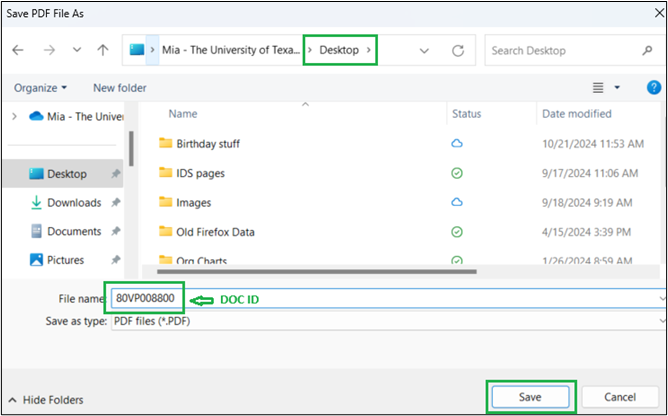
- Click the "Print" button on the print screen, which will open a separate window where you can name your document and select the location to save the new file. If you are ready to submit your document for imaging, you must name your document with the Doc ID (e.g., J0VP2123456). Click the "Save" button.
Reduce File Size
You will need to reduce the file size of your PDF if it is over 25MB. The following instructions are one way you might be able to reduce the file size. If, after following these steps, your file is still over 25MB, please contact IDS for further instructions.
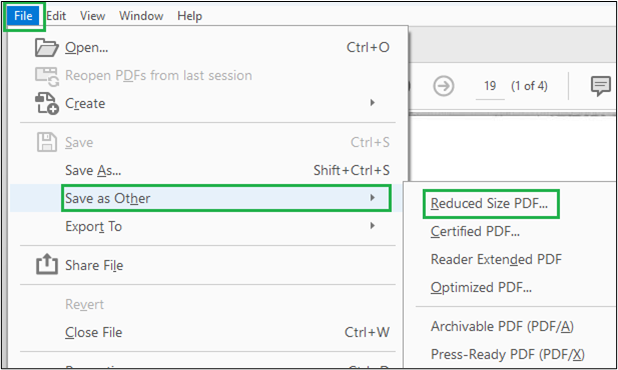
- With the PDF open, click "File" in the upper left-hand corner to open the File menu. See figure 6 below.
- From the drop-down menu, scroll down and hover your cursor over "Save as Other." See figure 6 below.
- From the drop-down menu that appears, click the top option, "Reduced Size PDF..."
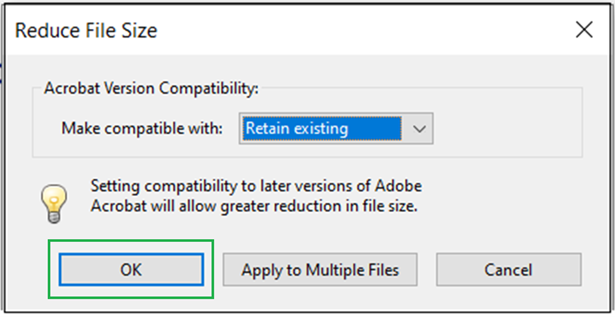
- The following box will pop up; click the "OK" button.
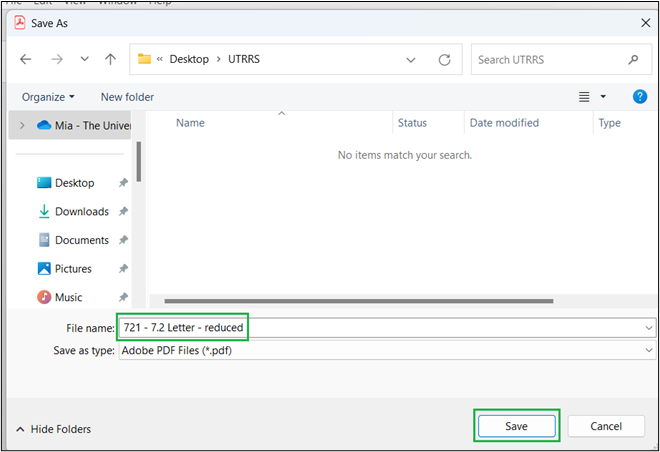
A separate window will open where you may rename your document, which will create a separate document, or you may replace your old document with your new, reduced-size document.
In figure 8, the document has been renamed, with "reduced" added to its file name. Click the "Save" button
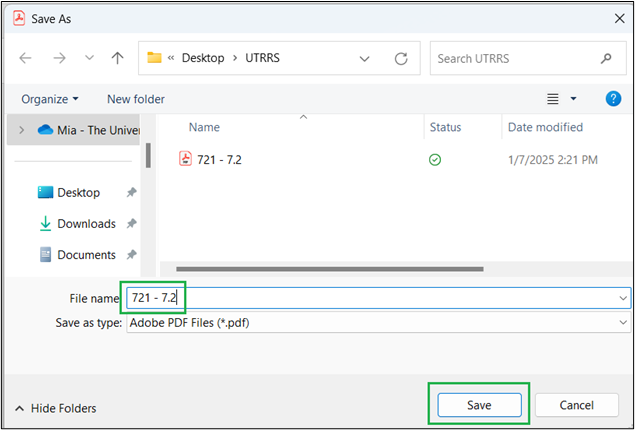
- If you want to replace the old document with the new, reduced-size version, use the same file name, as shown in figure 9. Click the "Save" button.
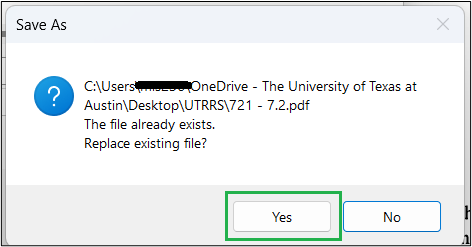
- The following window will pop up. Click the "Yes" button.
If your file is still over 25MB, please contact IDS.
Contact IDS
- Address:
-
Imaging and Documentation Services
110 Inner Campus Drive
Campus Mail Code: K5400
Austin, Texas 78712
- Phone: